Articles provide general information for the public, while Resources deliver technical guides and tools tailored specifically for ArdaCraft contributors.
Written by
Milack
Contents
This guide outlines the complete workflow for using the RenderCube toolchain to export modded Minecraft worlds and render them with cinematic quality in Blender.
Why use blender instead of in-game shaders?
In-game shader packs like Bliss combined with mods like Distant Horizons are incredible tools for gameplay. They offer dynamic weather and massive view distances. However, they rely on real-time rendering tricks to keep the game playable.
Blender removes these limitations entirely.
Perfect Lighting: Blender’s Cycles engine simulates actual light physics. You get accurate global illumination, light bounces, and soft shadows that real-time shaders can only approximate.
True Infinite Detail: While Distant Horizons allows you to see forever, it uses “Level of Detail” (LOD) to lower the quality of faraway chunks to save performance. In Blender, you can render a massive landscape with full geometry and texture fidelity right up to the horizon line.
Atmospheric Control: You have total control over the specific mood of the scene. You can dial in precise volumetric fog to create thick morning mist, adjust the sun angle to the exact degree, or change the camera focal length. This allows you to create a specific “cinematic feel” that standard wide-angle game cameras cannot achieve.
Step 1: Installation
The RenderCube toolchain works in two parts. You need to install a mod for Minecraft and an addon for Blender.
Minecraft: Drop the RenderCube .jar file into your mod directory.
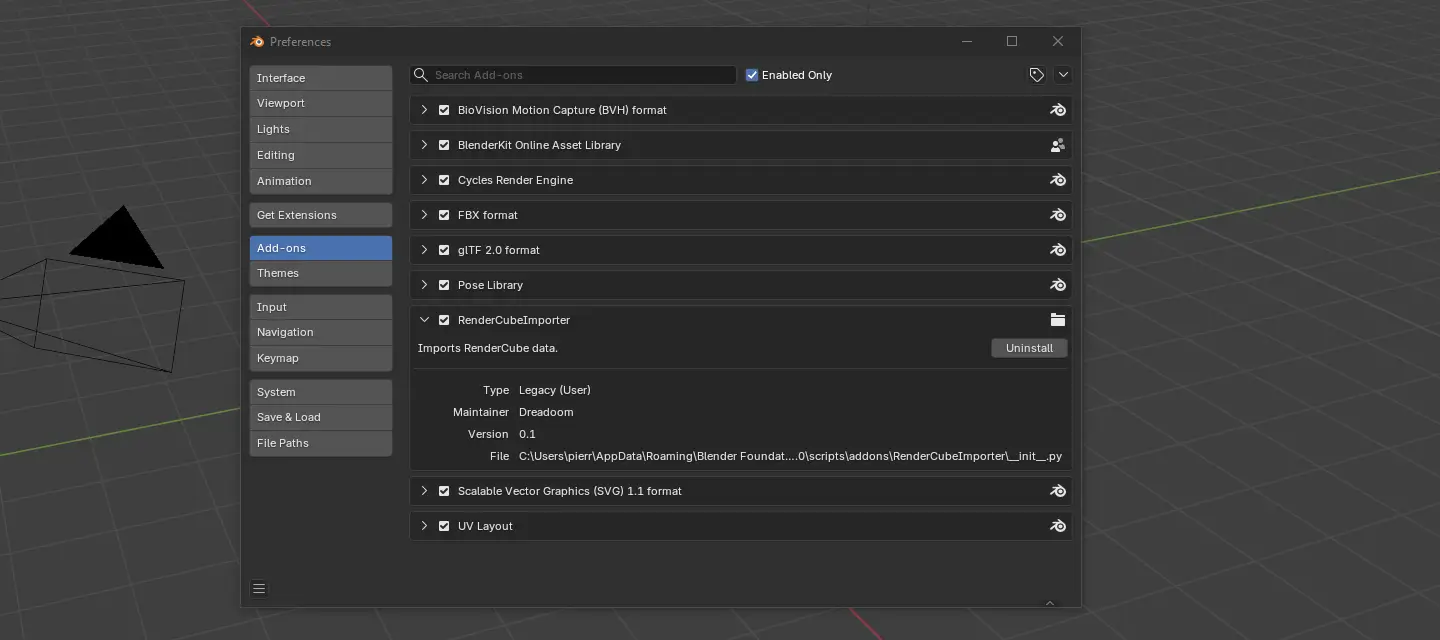
Blender: Open Blender, go to Edit > Preferences > Add-ons, and install the addon zip file.
Step 2: Exporting from Minecraft
Launch your game and load the world you want to capture.
Open the Menu: Press R to open the render interface.
Select Region: You can choose a “Relative” area (centered on your player) or input specific World Coordinates.
Render: Click the Render button. The screen will lock briefly while it captures the geometry.
Save Textures: This is critical. Press F3 + S to dump the texture atlases (images of blocks) to your disk.
Please note that your selection cannot exceed 400 blocks along any single axis.
Step 3: Importing to Blender
Now we move to the studio phase.
Navigate to your .ModrinthApp\profiles\ArdaCraft\rendercube folder to find your export.
Open Blender.
Go to File > Import > RenderCube (.rcube).
Select the 4 files.
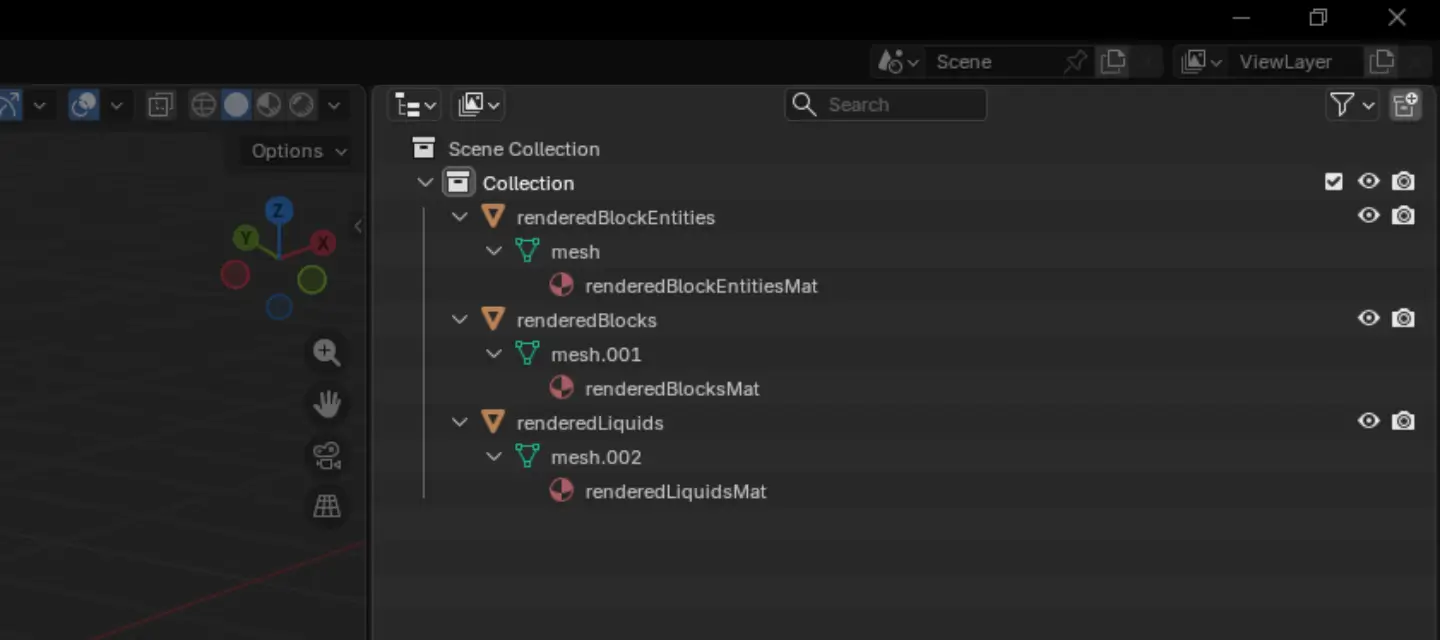
RenderCube will generate three distinct layers in your scene: Blocks, Entities, and Liquids.
Step 4: Setting up block & entity materials
The materials need to be connected manually to ensure they display correctly. You will need to do this for the Blocks layer first, and then repeat it for the Entities layer.
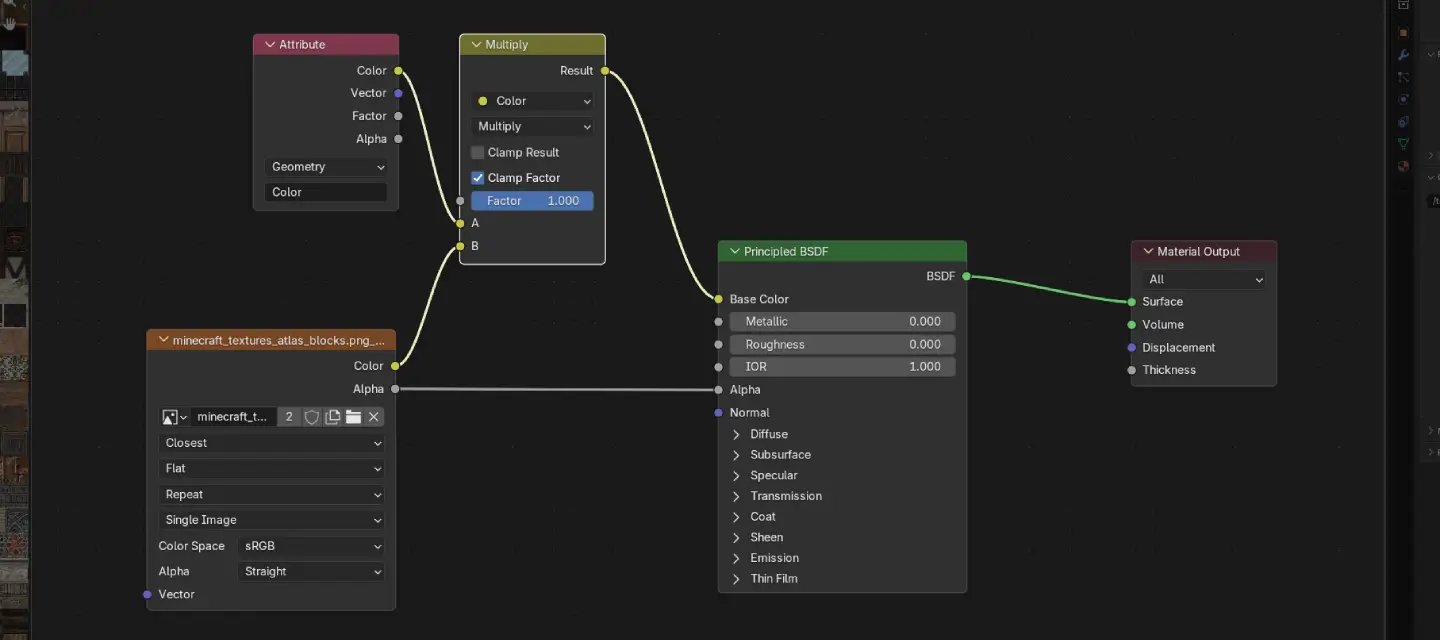
Select the object (e.g., the Blocks layer) and open the Shader Editor tab.
Press Shift + A and search for Image Texture. Click to add the node.
Open the texture atlas image you dumped earlier (.ModrinthApp\profiles\ArdaCraft\screenshots\debug\minecraft_textures_atlas_blocks.png_0.png).
Connect the Nodes:
Drag the Color output of the texture node to the B Color input of the Multiply node.
Drag the Alpha output of the texture node to the Alpha input of the BSDF shader.
Fix Blurry Textures: On the Image Texture node, change the interpolation from Linear to Closest. This restores the sharp, pixel-perfect Minecraft look.
Repeat these exact steps for the Entity layer.
Step 5: Realistic water (using BlenderKit)
Standard Minecraft water looks flat in renders. To get high-quality reflections and refractions, we will replace the basic water material with a realistic asset from the BlenderKit library.
Enable BlenderKit: Go to Edit > Preferences > Add-ons, search for “BlenderKit Online Asset Library,” and check the box to enable it.
Open the Toolbar: In the 3D Viewport, press N to open the sidebar and click the BlenderKit tab.
Search for Water: Type “Water” or “Ocean” into the search bar.
Apply the Material: Select the Liquids object in your scene. Find a water material you like in the list and drag it directly onto the object.
Adjust Scale: If the ripples look too big or too small, go to the Shader Editor and adjust the Scale or Mapping nodes of the new material until it matches the scale of your blocks.
Step 6: Final Atmosphere
Note: For the best results, ensure your Render Engine is set to Cycles. Eevee is faster, but it cannot calculate the realistic light bounces and thick fog we need for this style.
Lighting the World (Sun & Sky)
Instead of relying on a static image, we will build a dynamic sky that reacts to your sun.
The Sun: Press Shift + A and add a Light > Sun. Rotate it to cast interesting shadows across your build. In the light settings, set the Angle to roughly 5°. This softens the edges of the shadows, making them look less like a video game and more like sunlight filtering through the atmosphere.
The Sky Texture: Go to the World Properties tab (red globe icon). Click the yellow dot next to “Color” and select Sky Texture.
Sun Size: Increase this to 2.0 or 3.0 for softer lighting.
Sun Elevation: Lower this to get a “Golden Hour” look with long shadows.
The Camera
Minecraft assumes a very wide, distorted viewing angle. For a cinematic look, we need to treat the camera like a physical lens and place it deliberately.
Positioning the Camera: The easiest way to frame your shot is to fly around the viewport until you find an angle you like. Then, press Ctrl + Alt + Numpad 0. This instantly snaps the camera to your current view.
Fine-Tuning: Press N to open the side panel, go to the View tab, and check Camera to View. Now, when you navigate the viewport, the camera moves with you, allowing for precise adjustments. Don’t forget to uncheck it when you are done!
Focal Length: Select your camera and go to the Camera Properties (green camera icon). Change the focal length from the default 50mm:
Use 24mm or 35mm for sweeping landscapes (wide angle).
Use 85mm or higher for portraits of specific buildings. This compresses the background and makes your build feel massive.
Depth of Field: Check the Depth of Field box. Pick an object in your scene as the “Focus Object” and set the F-Stop to a low number (like 2.8 or 1.8). This blurs the foreground and background slightly, directing the viewer’s eye exactly where you want it.
Adding Fog
The signature look of Bliss shaders is the thick, volumetric fog that catches the light. We can recreate this physically in Blender.
Go to the Shader Editor and switch the dropdown from Object to World.
Press Shift + A and search for Volume Scatter.
Connect the Volume output of the scatter node to the Volume input of the World Output node.
Crucial Settings:
Density: Set this very low! Start at 0.01 or even 0.005. If it is too high, your scene will go black.
Anisotropy: Increase this to around 0.7. This makes the fog glow intensely around the sun, creating those beautiful “god rays” or light shafts coming through windows and trees.
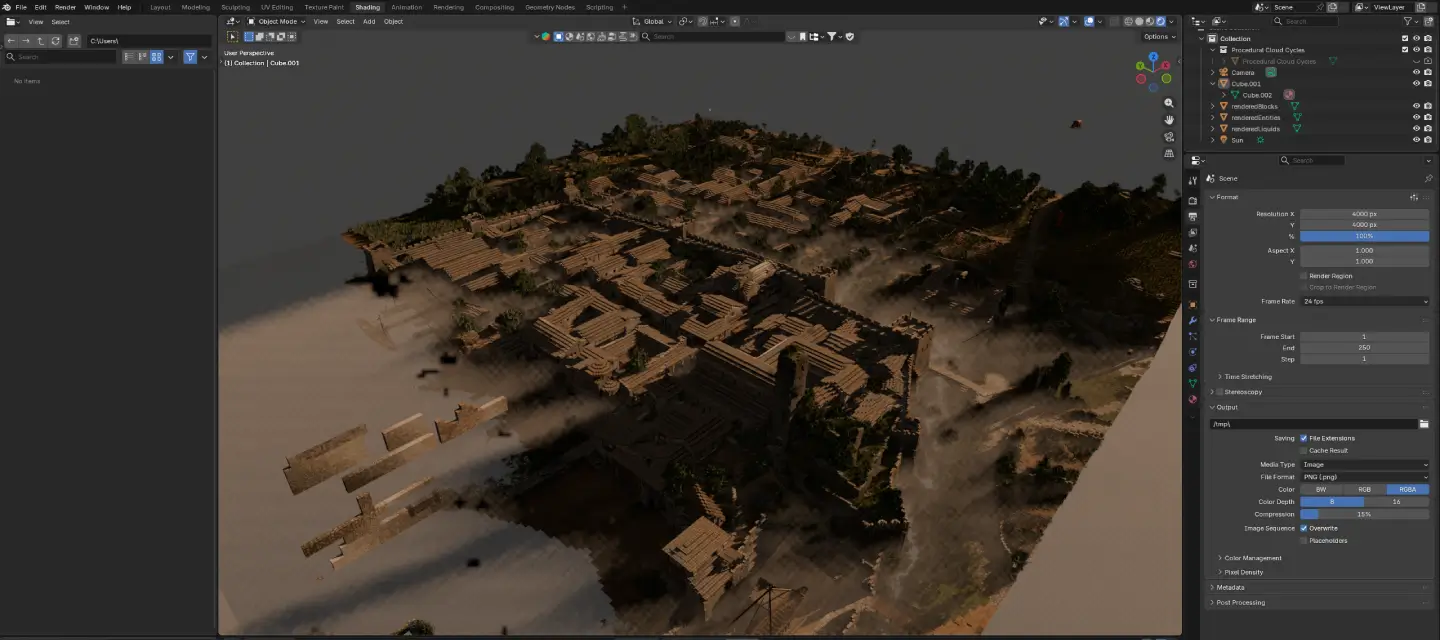
Wrapping Up
You now have a professional workflow to transform in-game builds into studio-quality art. By mastering Blender’s lighting and atmosphere, you can finally bypass the limitations of real-time rendering and present your creations exactly as you imagine them.
Stuck? If you run into issues or need advice on your render, feel free to reach out to me, Milack.